Cambium Passpoint Conversion - Basic Settings
For support, please contact: support@longfisolutions.com
High-Level Steps:
- Deploy Local RadSecProxy
- Import LongFi WLAN JSON Config File into Cambium CnMaestro
- Change the Access VLAN, AAA Servers, and any other SSID settings
- Enable SSID, deploy WLAN to AP Groups, Test Validate
Deploy Local RadSecProxy
Cambium does not support RadSec natively, so we need a Local RadSecProxy running on a Virtual Machine on-site, or in a cloud VM that can be accessed via a VPN tunnel from the local network. Please visit our public GitHub repository for instructions on deploying the local radsecproxy:
https://github.com/LongFi-Solutions/longfi-radsecproxy
Take note of the IP address and shared secret of your Local RadSecProxy deployment. You will need this to configure the AAA RADIUS servers in the Passpoint/Hotspot 2.0 WLAN.
*Please note that Cambium has native RadSec support on their roadmap, with a planned OS and firmware update in the fall of 2026
Import LongFi WLAN JSON Config File into Cambium CnMaestro
You will be provided with a JSON configuration file that has 90% of what is required pre-configured for a new WLAN in Cambium CnMaestro. This will be attached to your onboarding and activation emails.
- To import the JSON Config file, from the CnMaestro main dashboard, on the left menu bar go to Configuration > Wi-Fi Profiles
- Click the button to Import a Wi-Fi Profile
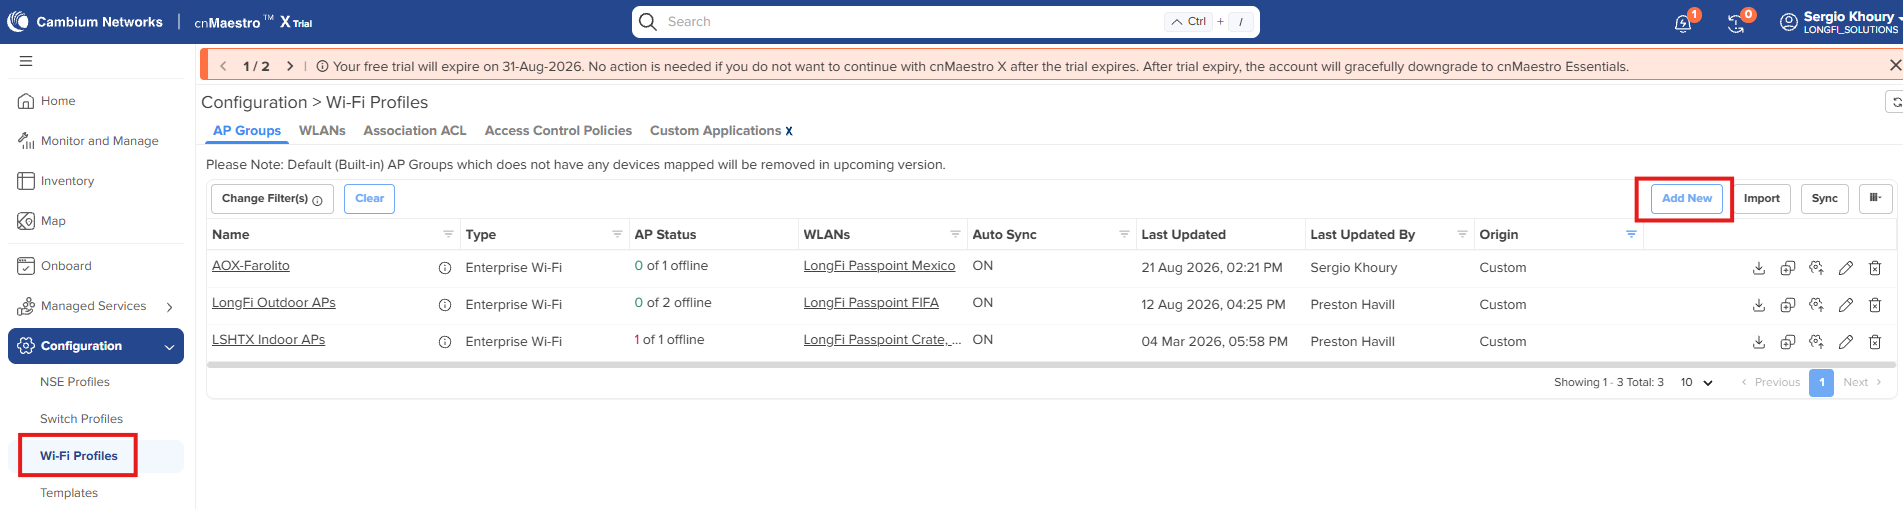
- In the Import WLAN window, give the Wi-Fi Profile a Name
- Under Configuration file, select the JSON Config file provided by LongFi
- Click Import to import the config
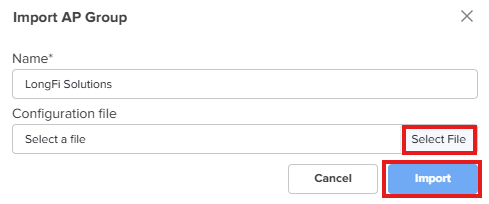
Change the Access VLAN, AAA Servers, and any other SSID settings
After importing the JSON Config File into CNMaestro, you will see it in the WI-FI Profile list.
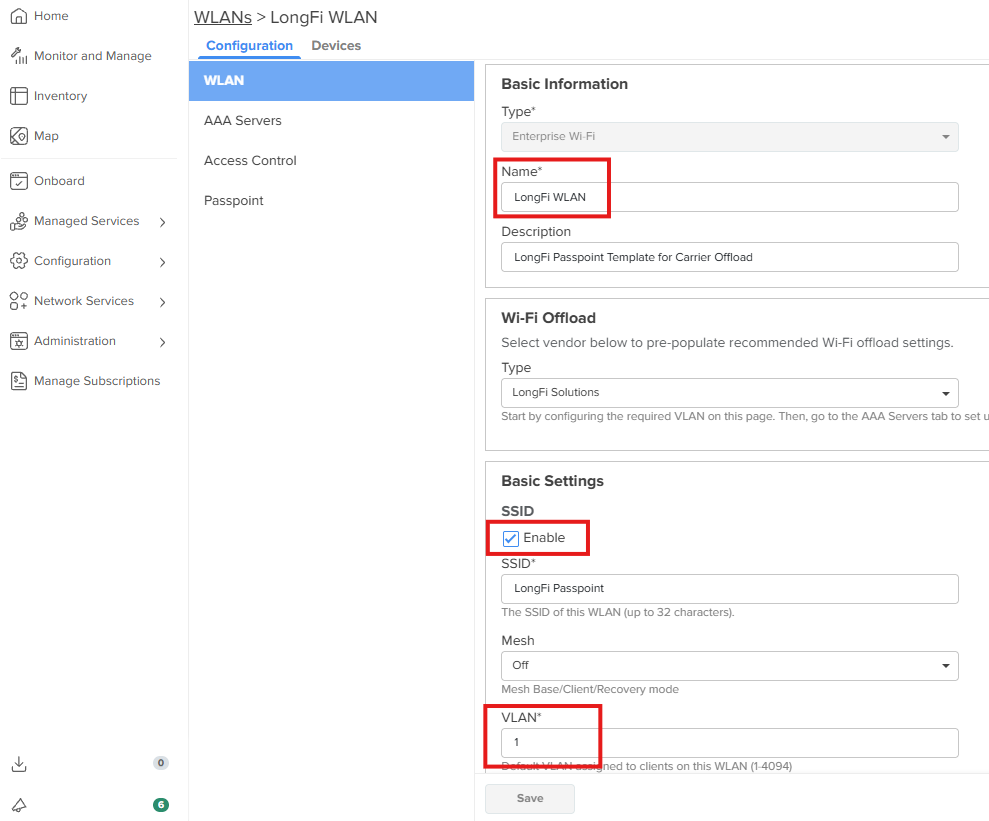
Click on the newly created WLAN and change the following:

- SSID Broadcast Name (if you like)
- SSID Enable (disabled by default, enable when ready)
- VLAN - set the access VLAN for an isolated VLAN for your guest/passpoint network segment
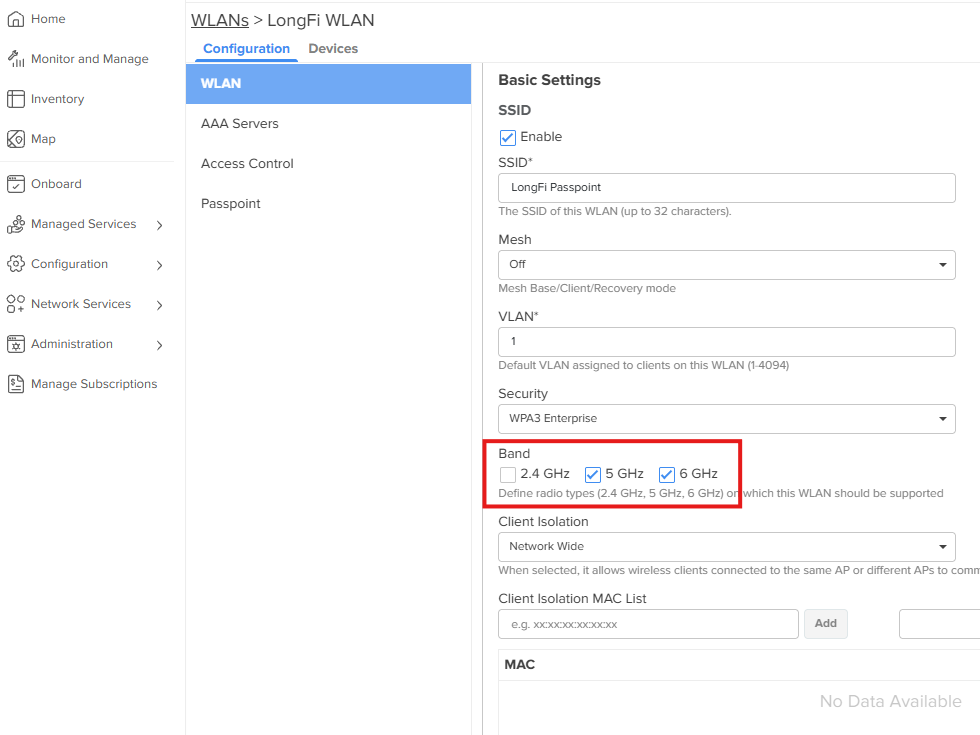
- Band - enable 6 GHz if required; the JSON config has 5 GHz only (we do not recommend 2.4 GHz)
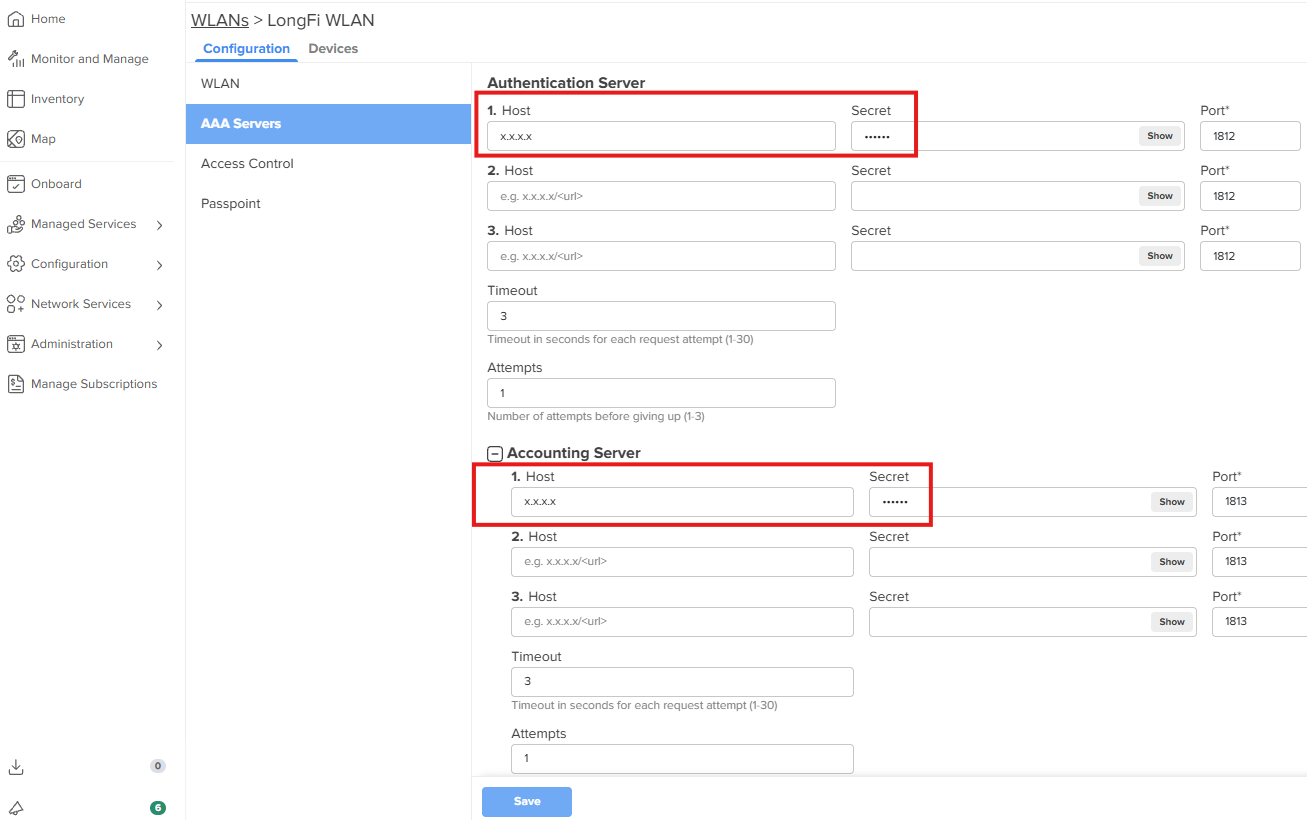
- AAA Servers - Set the Authentication Server Host IP to the IP of your Local RadSecproxy VM
- AAA Servers - Set the Secret to the secret you created when deploying your Local RadSecproxy VM
- AAA Servers - Set the Accounting Server Host IP to the IP of your Local RadSecproxy VM
- AAA Servers - Set the Secret to the secret you created when deploying your Local RadSecproxy VM
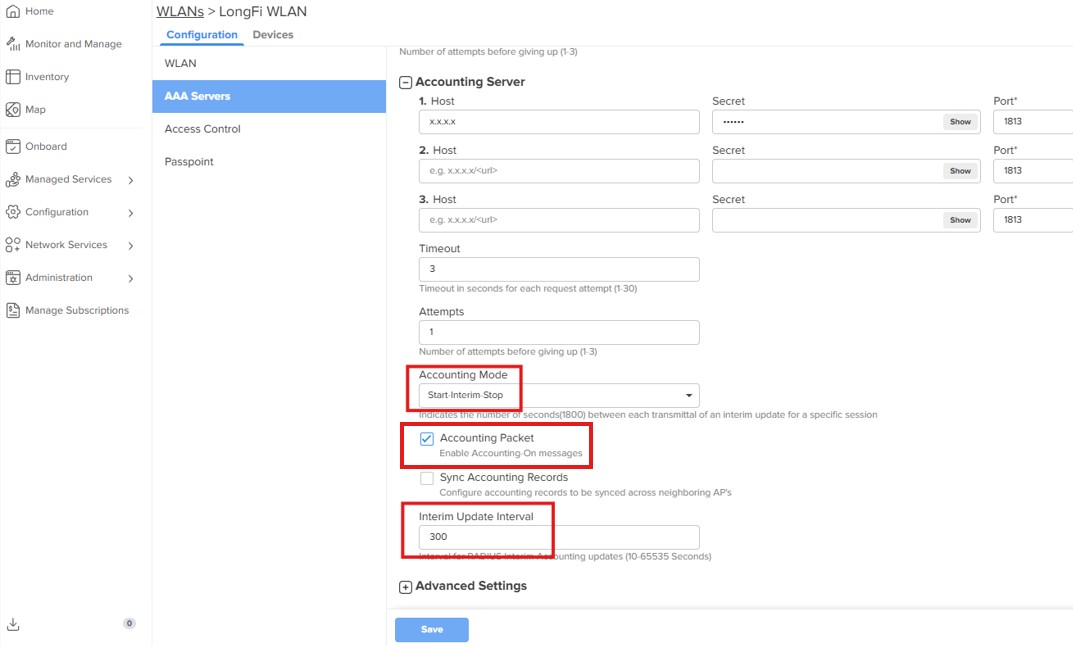
- AAA Servers > Accounting Mode - Set Accounting Mode to Start-Interim-Stop.
- AAA Servers > Enable Accounting Packet
- AAA Servers > Interim Update Interval - Set it to 300
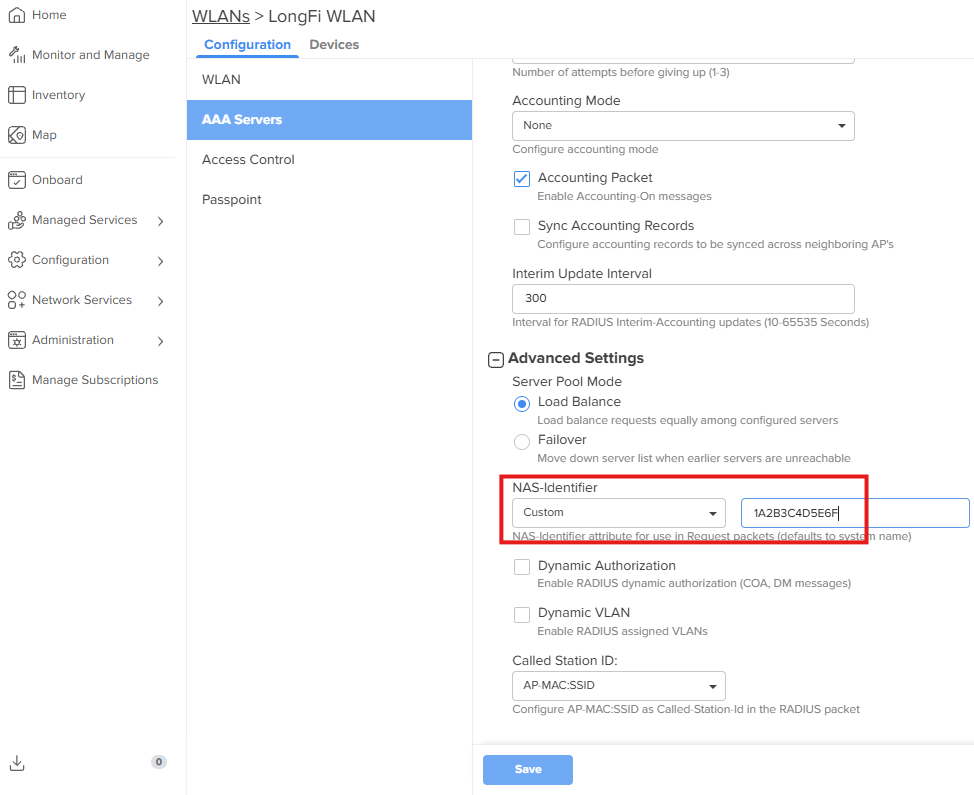
- AAA Servers > Advanced Settings - Set the NAS-Identifier to Custom and copy paste the NAS ID you used to activate the site. This is normally a MAC address and will be included in your onboarding and activation emails.
- Click on Passpoint, then expand the NAI (Network Access Identifier) Realm List, and click on Add New.
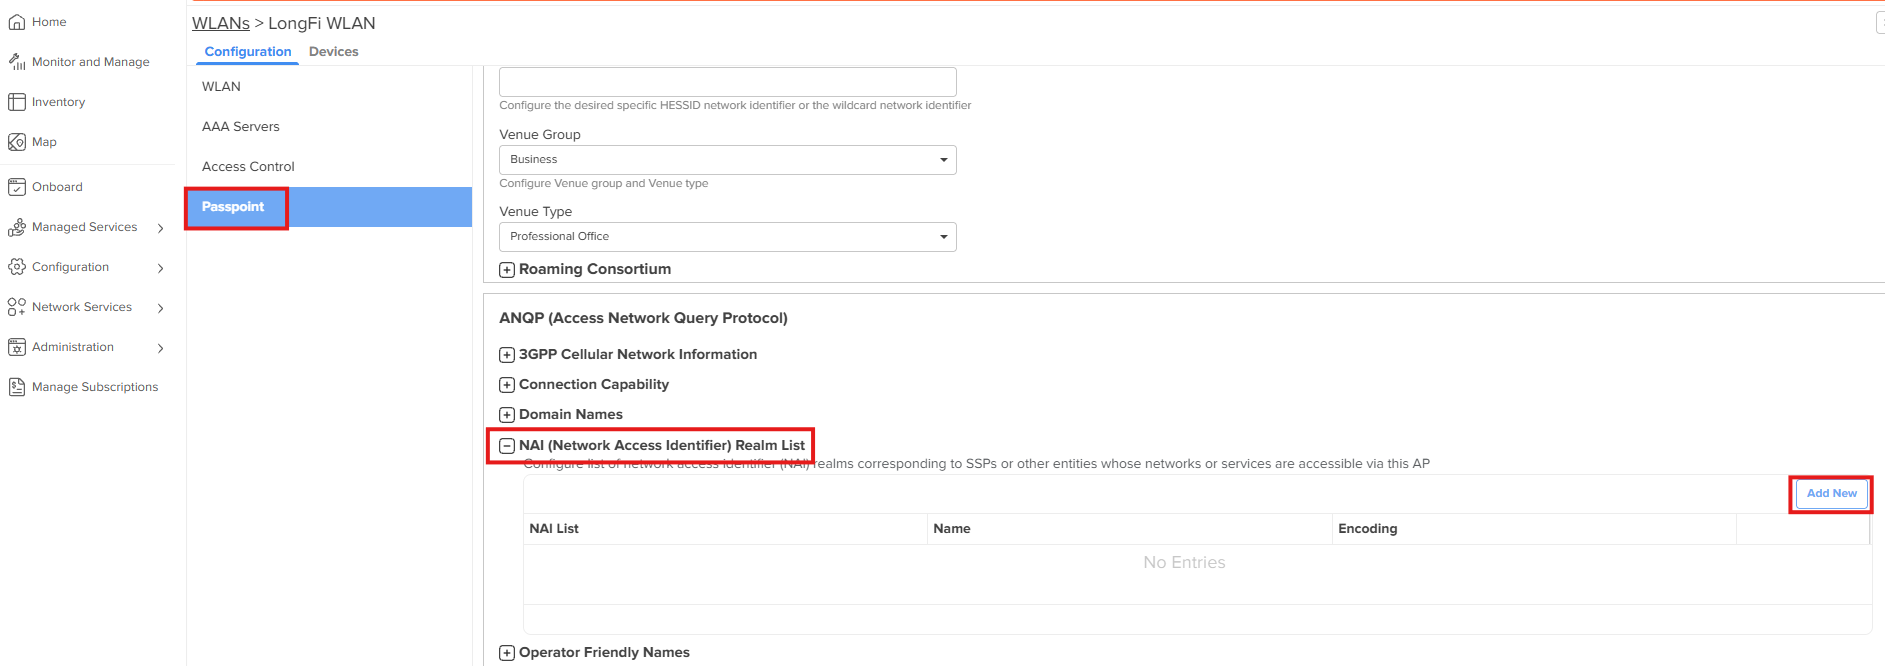
- Add any additional NAI Realms that were approved for activation for your site. These will be provided in your onboarding and activation emails. Include the EAP methods specified in the emails. Click on Add, then Save.
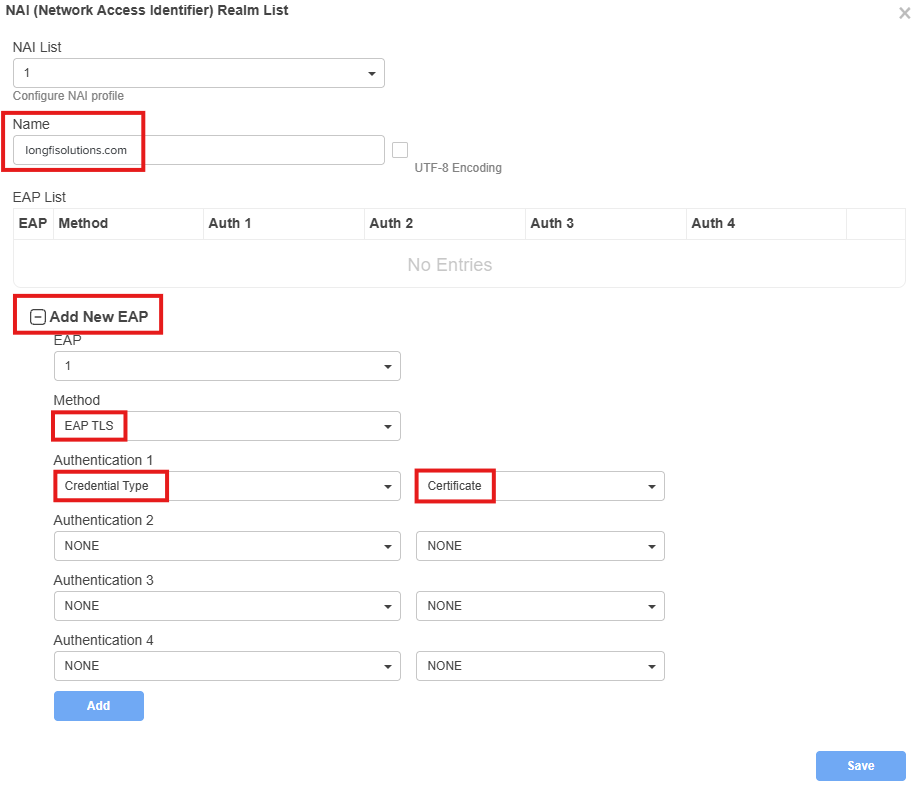
- Expand the 3GPP Cellular Network Information, and click on Add New.
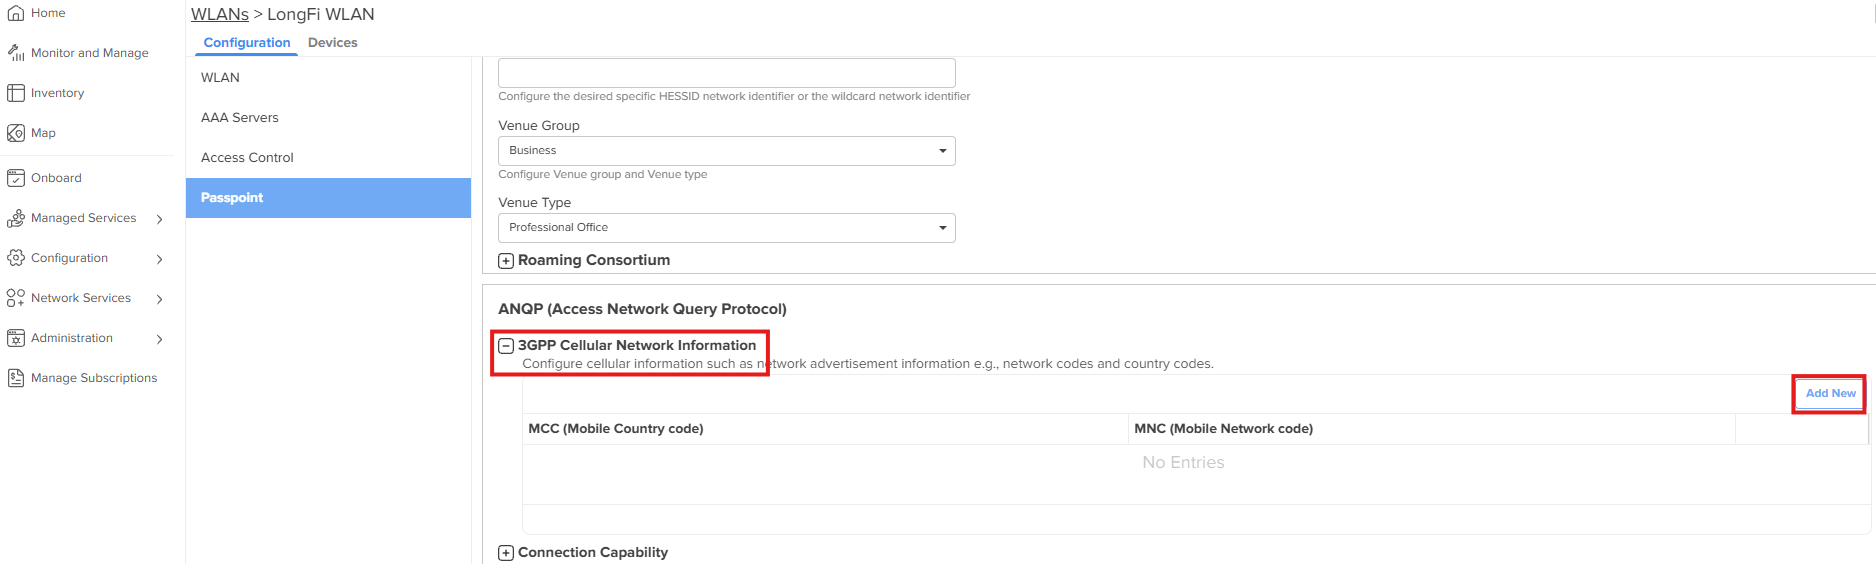
- Passpoint > 3GPP Cellular Network Configuration - add any 3GPP PLMN IDs that were activated for your site. These will be provided in your onboarding and activation emails.
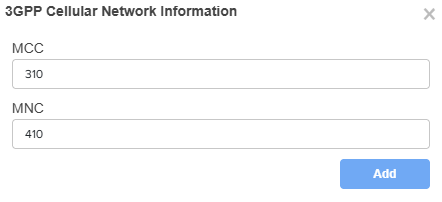
- Set any other SSID settings per your design and requirements
- Save the WLAN and deploy it to the required APs and AP Groups for your site
Important Note
The NAS-Identifier (NAS ID) must be unique for every site. Cambium CnMaestro will allow you to clone the WLAN, give it a new name, and set the unique NAS ID under AAA Servers > Advanced Settings > NAS-Identifier. There may be a workflow for deploying a single WLAN to multiple sites, and using the Templates or User-Defined Overrides in CnMaestro to set the NAS ID to the unique value for each site. LongFi has not tested this workflow at the time of writing this guide. It may look something like this: