Alta-Labs
Alta Labs Passpoint Conversion - Basic Settings
For support please contact: support@longfisolutions.com
1. Create the Passpoint SSID
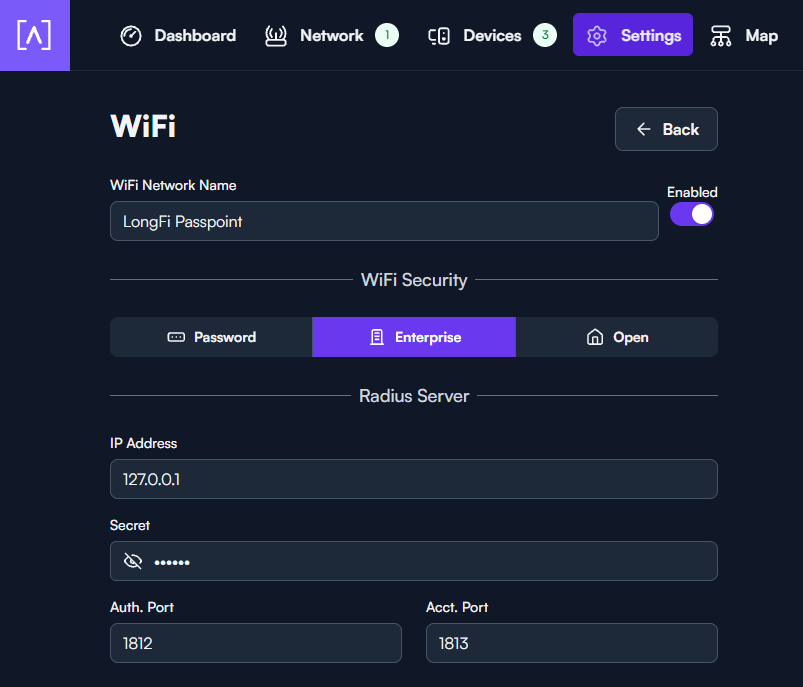
Create a new SSID in the Alta Labs controller. Go to Settings > WiFi > Add New. Passpoint was previously known as Hotspot 2.0.

- Enter the SSID name
- Select Enterprise security
- Enter the RADIUS server settings shown below
2. Assign the Site and APs
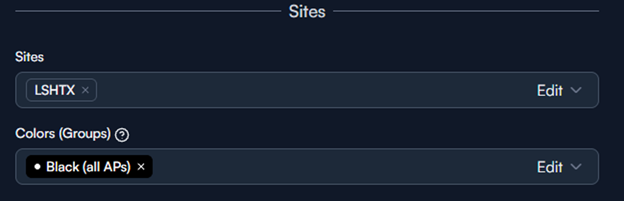
Under Sites, select the site where this configuration will be used and choose the APs that should broadcast the SSID.
3. Configure Advanced Network Settings
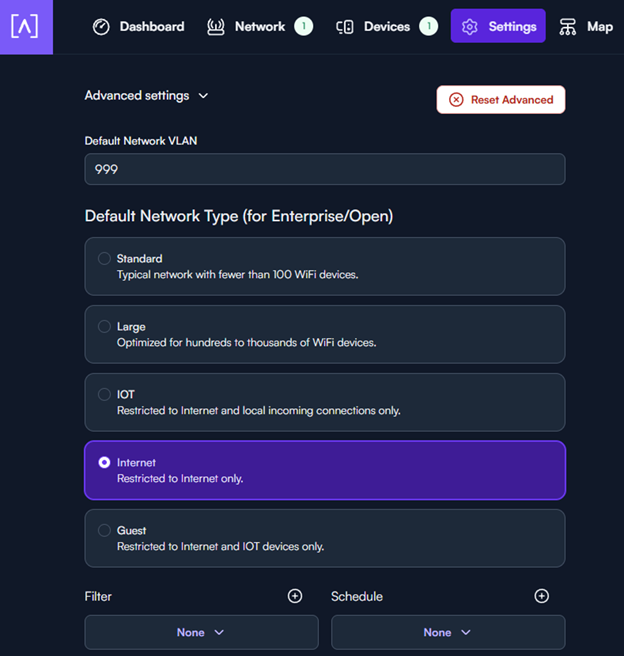
- Configure the required VLAN
- For Default Network Type, select Internet
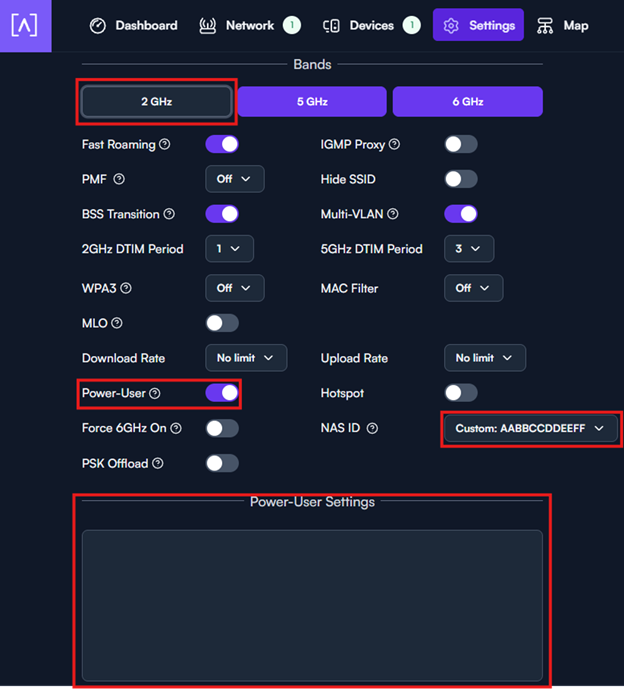
- Under Bands, disable the 2 GHz band
- For NAS ID, select Custom and enter the MAC address provided during onboarding
- Enable Power-User
You will be provided with a JSON configuration file that has what is required pre-configured for a new WLAN in Alta. This will be attached to your onboarding and activation emails.
You will add the JSON configuration under Power-User Settings, then click on the Save button at the bottom of the page.