Juniper Mist Passpoint Conversion Guide
For support please contact: support@longfisolutions.com
Prerequisites
LongFi Connect configuration requires the Passpoint protocol. Please ensure your Mist system is running the latest firmware, your AP models support Passpoint/Hotspot 2.0, and you have basic traffic routing working with existing SSID(s) and VLANs.
Note
Before you can activate Passpoint in your Mist Organization, you will first need to register your site, provide a NAS ID, and obtain certificates. Please review the RadSec with Mist section of this guide before proceeding with SSID and RADIUS configuration.
You will also need:
- The NAS ID and RadSec certificates obtained during your site Onboarding & Activation
- A guest VLAN with the appropriate network segmentation, security, traffic shaping, and firewall policies for your requirements.
- The guest VLAN needs a large DHCP pool with a short lease time. Passpoint clients can automatically discover and join a network, and there will be many more "transient client" connections than a normal guest wifi network.
High Level Steps
- Upload RadSec Certificates to Mist Organization
- Configure the Passpoint Wi-Fi SSID
- Build Hotspot 2.0 Profile
- Configure RADIUS for the Passpoint Wi-Fi SSID
RadSec with Mist
LongFi now supports a hosted RadSec authentication model for Mist networks. This allows Mist partners to connect to the LongFi network without hosting their own proxy or VPN, while maintaining carrier-grade security and data accuracy.
For more information on configuring Mist for RadSec, see:
https://www.mist.com/documentation/radsec/
Note
The official Mist documentation states that "you will need to import the Mist CA certificate to your RADIUS server". LongFi Connect Passpoint allows Mist APs to operate as RadSec Clients, without sharing your Mist CA with LongFi. However, Mist only allows a single set of AP RadSec certificates per Organization. If you are already using a separate set of AP RadSec certificates for another service, please contact us and we can arrange mutual CA exchange.
Upload Certificates
You will be provided with a unique certificate bundle containing 3 certificate files:
- longficonnect.ca.pem
- example.cert.pem
- example.key.pem
Open each file in a text editor, you will need to copy and paste the text of the certificates into Mist
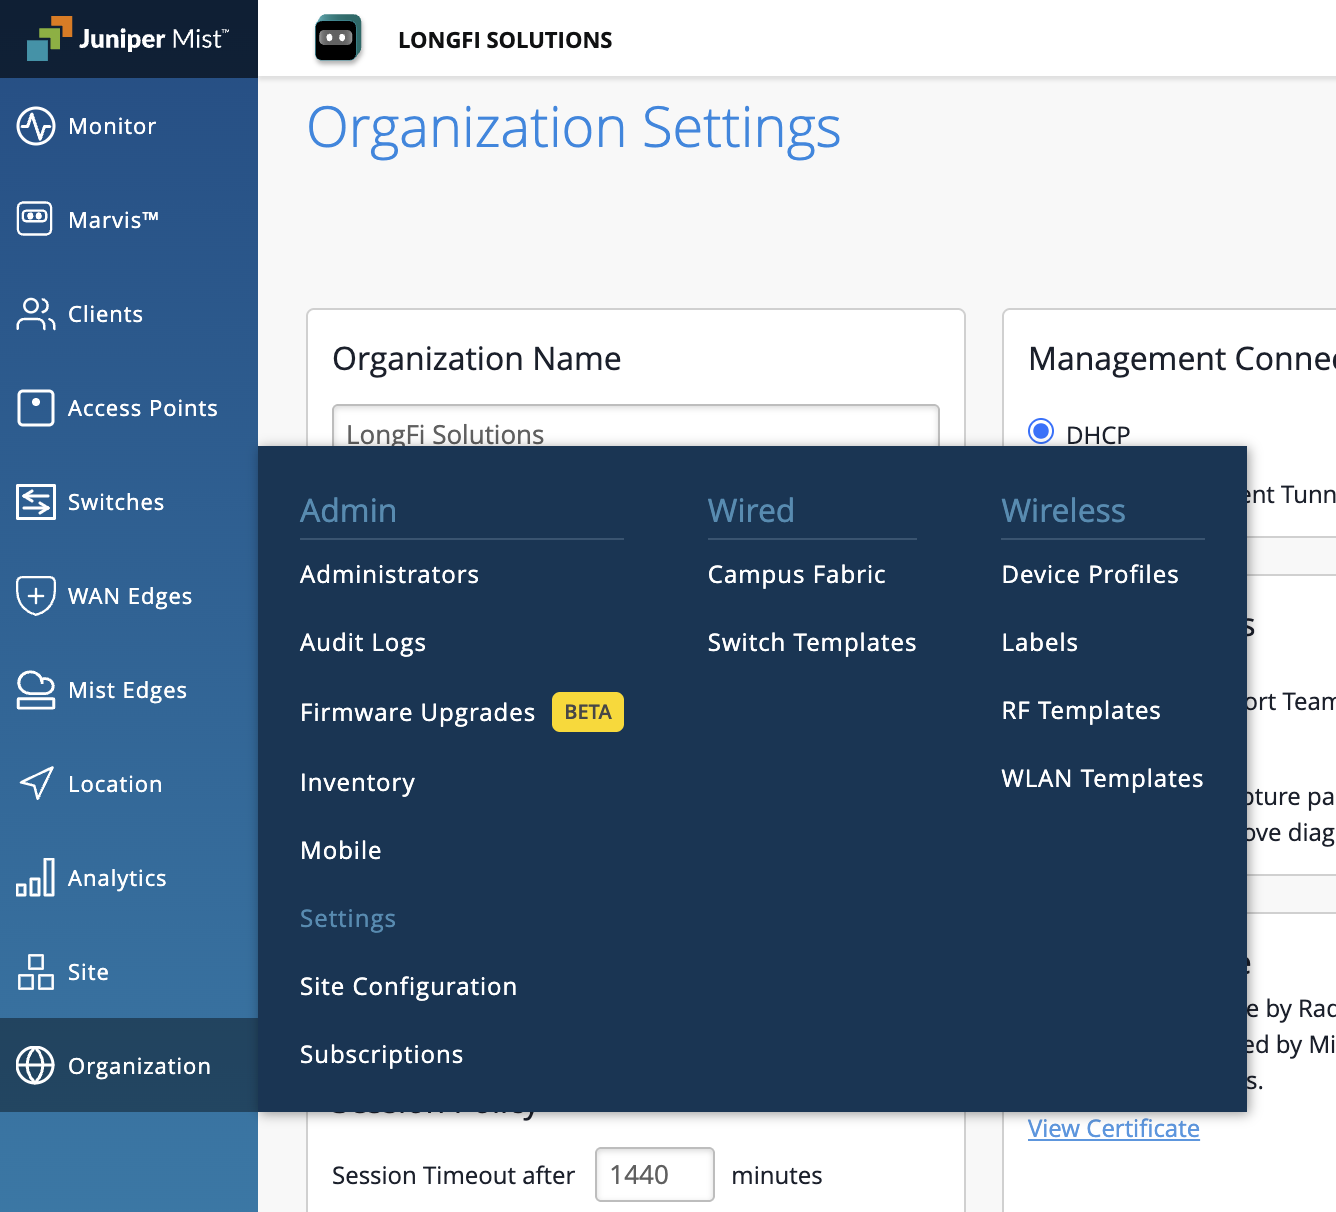
From the Juniper Mist dashboard go to Organization > Settings
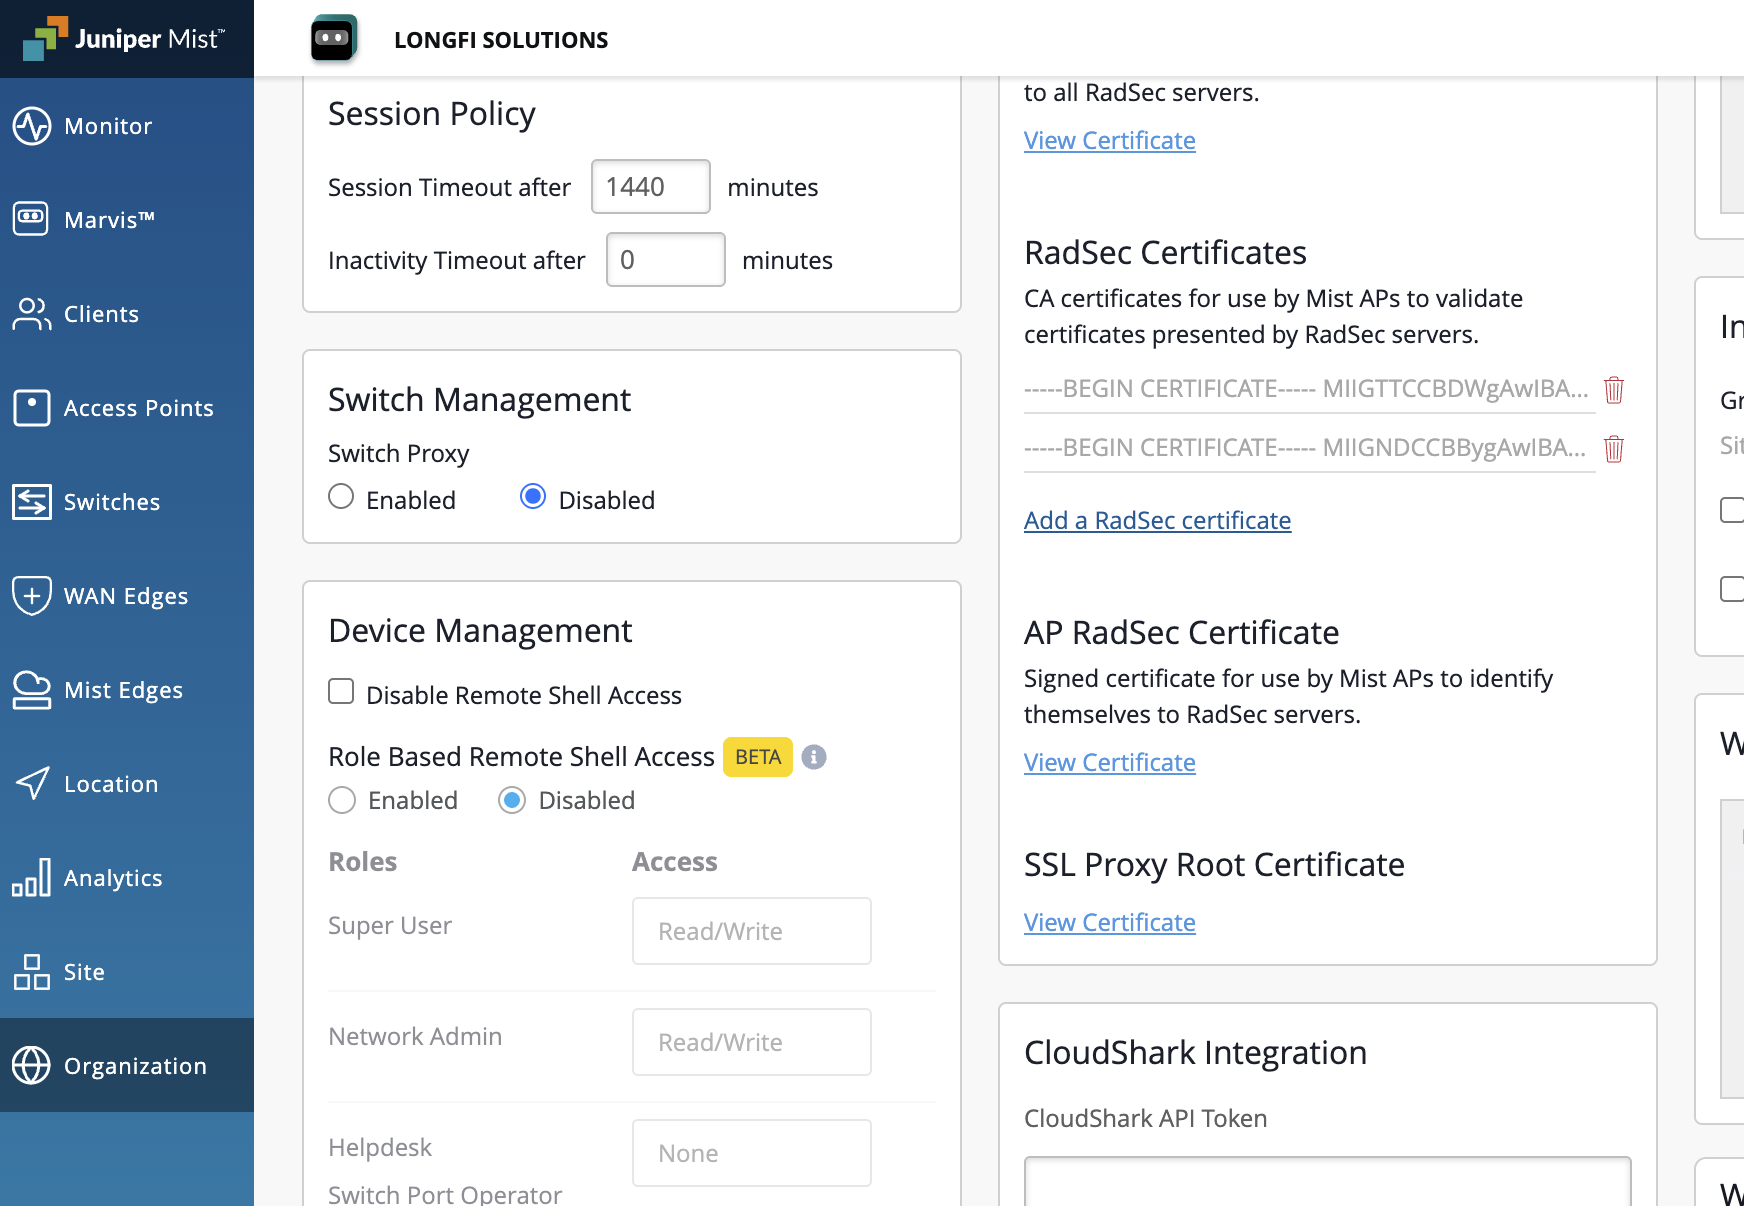
Under RadSec Certificates choose Add a RadSec certificate
- Open the ca.pem certificate in a text editor
- You will notice more than one certificate in the longficonnect.ca.pem file in the text editor. You will need to add them one at a time into Mist.
- Copy the first certificate all the way from -----BEGIN CERTIFICATE----- to -----END CERTIFICATE----- into the RadSec Certificate window in Mist
- Click Add
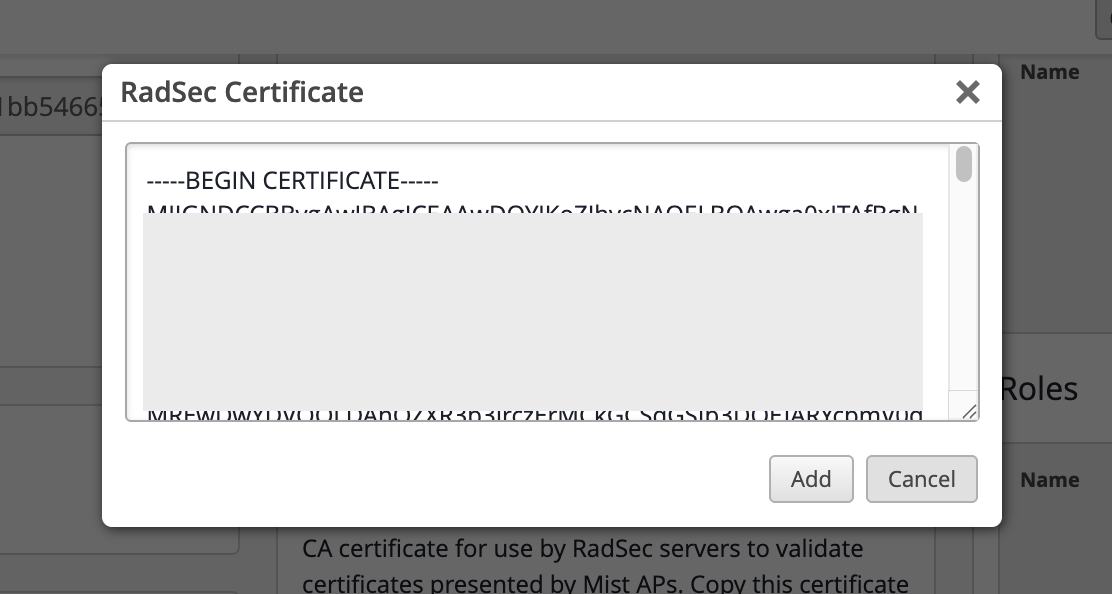
- Click Add a RadSec certificate again and repeat this process for all certificates in the ca.pem file
- Under AP RadSec Certificate click Add AP RadSec certificate
- Open the key.pem certificate in a text editor
- Copy and paste the text from the key.pem certificate file into the Private Key window in Mist
- Open the cert.pem certificate in a text editor
- Copy and paste the text from the key.pem certificate file into the Signed Certificate window in Mist
- Click Save to save the AP RadSec Certificate
Configure the Passpoint Wi-Fi SSID
From the Juniper Mist dashboard go to Site > Wireless > WLANs
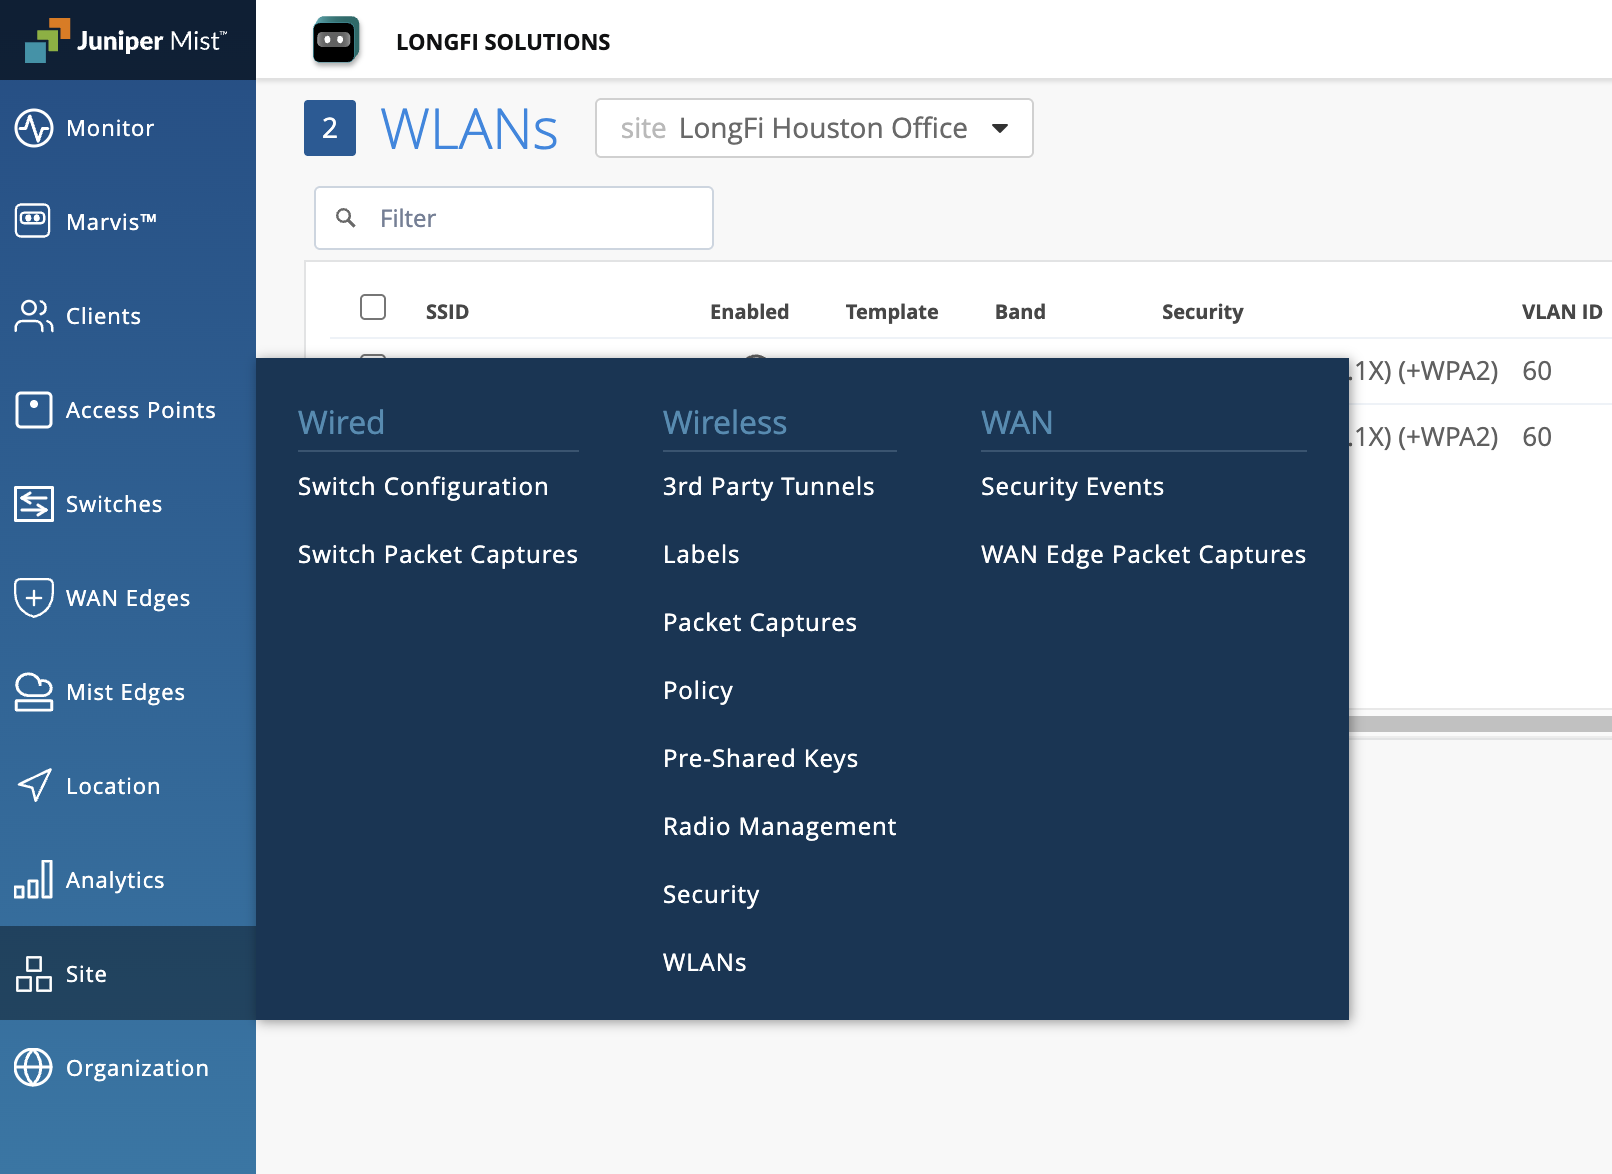
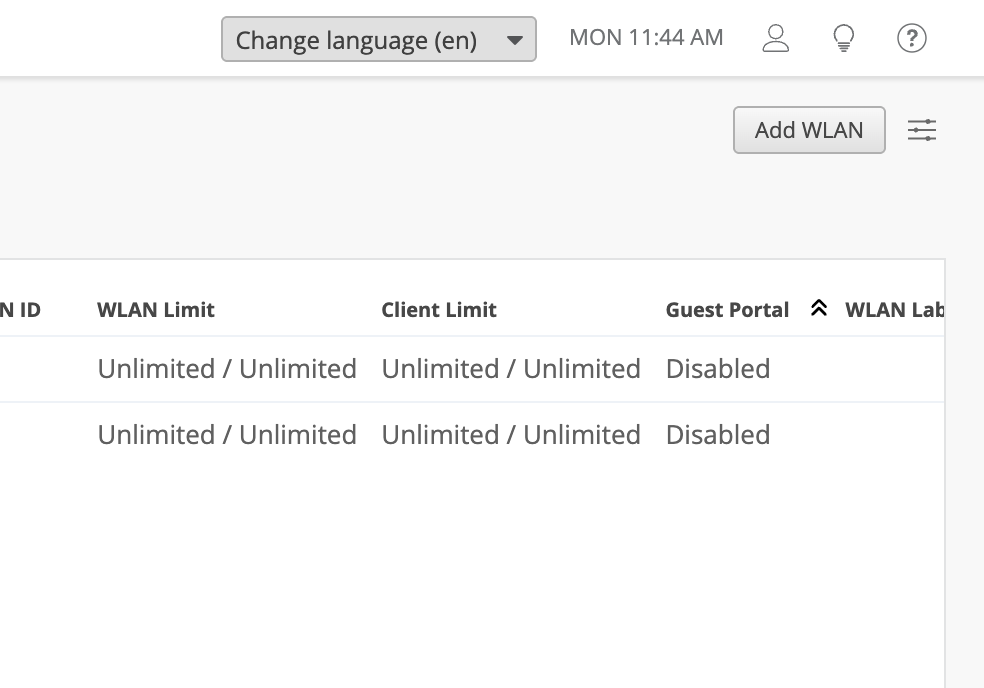
Click Add WLAN
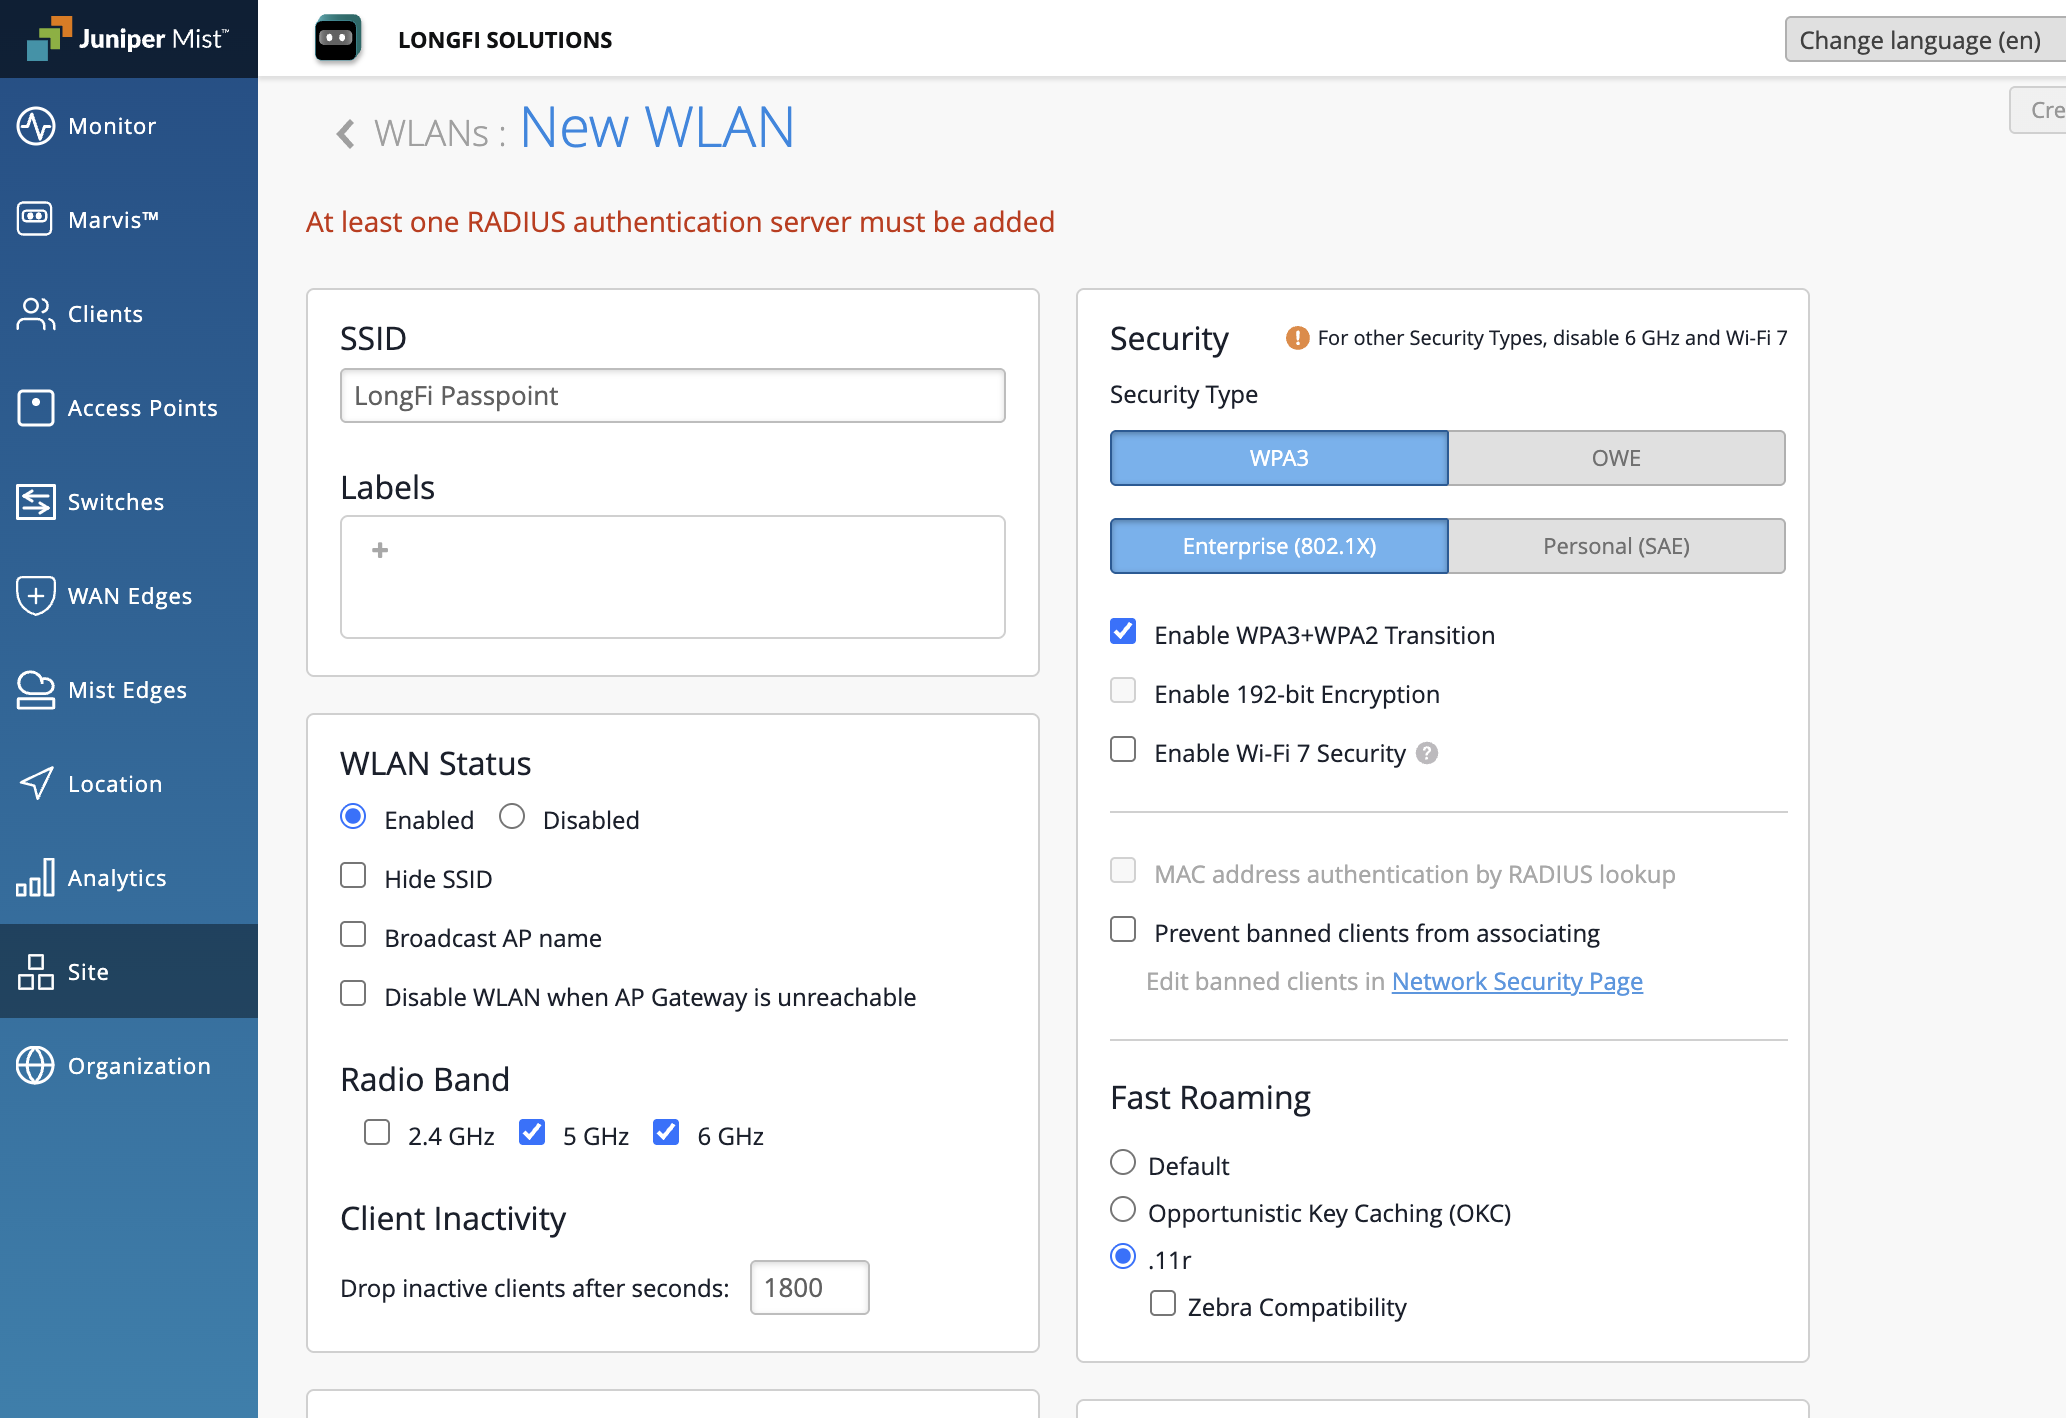
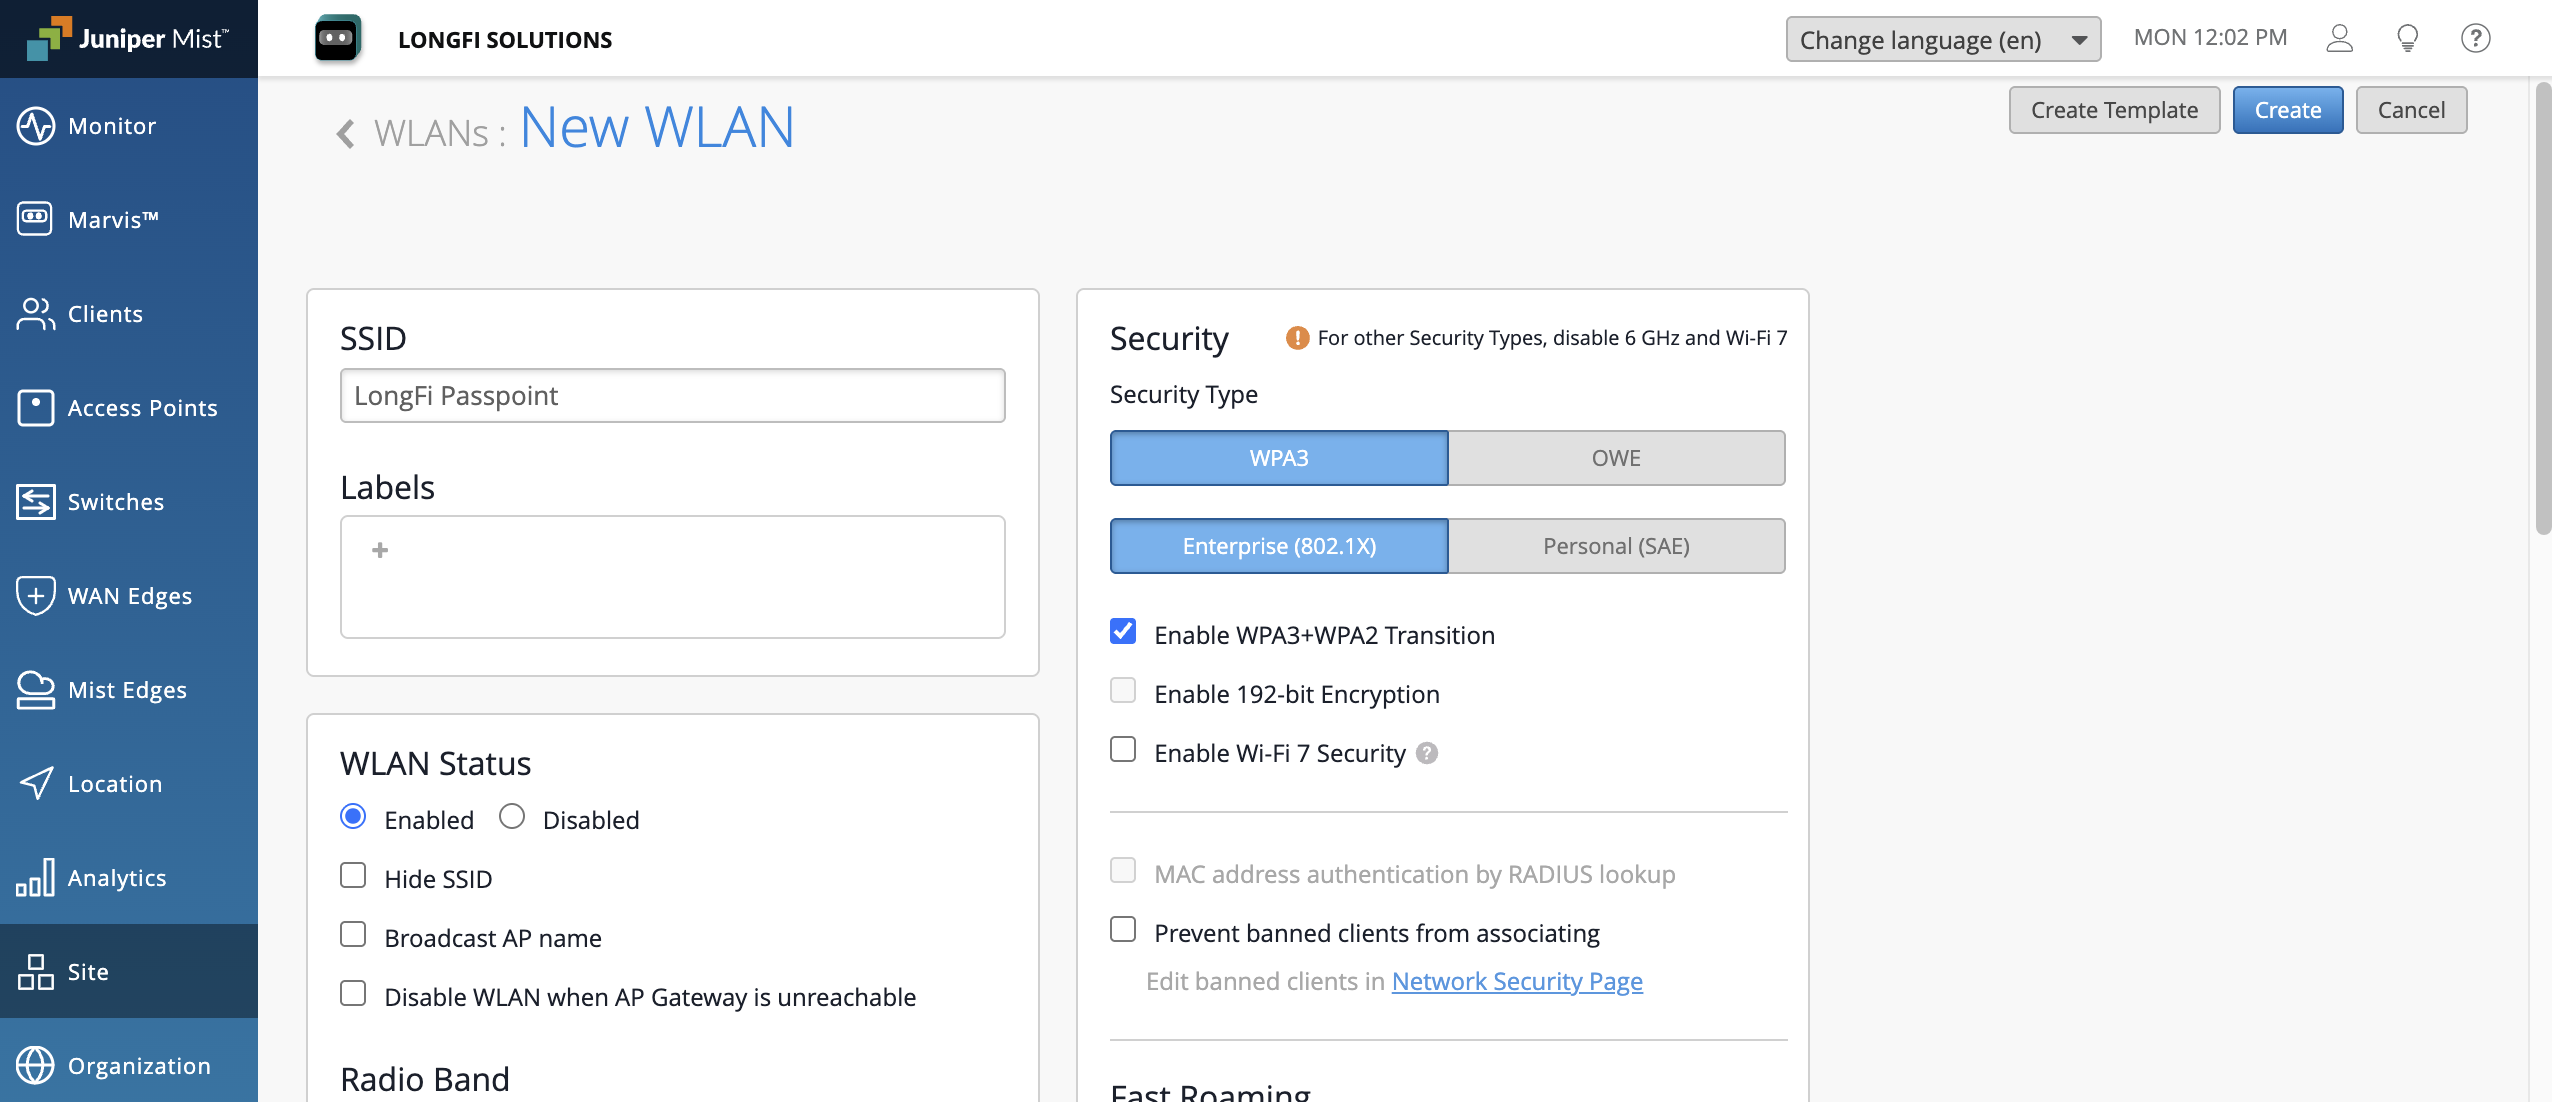
- Name the new WLAN LongFi Passpoint
- Under Security set the Security Type to WPA3 and Enterprise (802.1X)
- Note: you may also use WPA2 and Enterprise (802.1X) to provide better support for legacy clients, however to use WPA2 6 GHz and Wi-Fi 7 must be disabled
Note
You can also deploy WLANs in Mist from Organizations > WLAN Templates. However, the RADIUS NAS Identifier must be unique for every site. At this time we have not validated how to override the NAS ID at the site level when deploying the Passpoint SSID from an org-wide template. Please contact us if you have this requirement. This will most likely be done using Juniper Mist RADIUS Attributes and Using Site Variables to Add a Server
Build Passpoint/Hotspot 2.0 Profile
(image here)
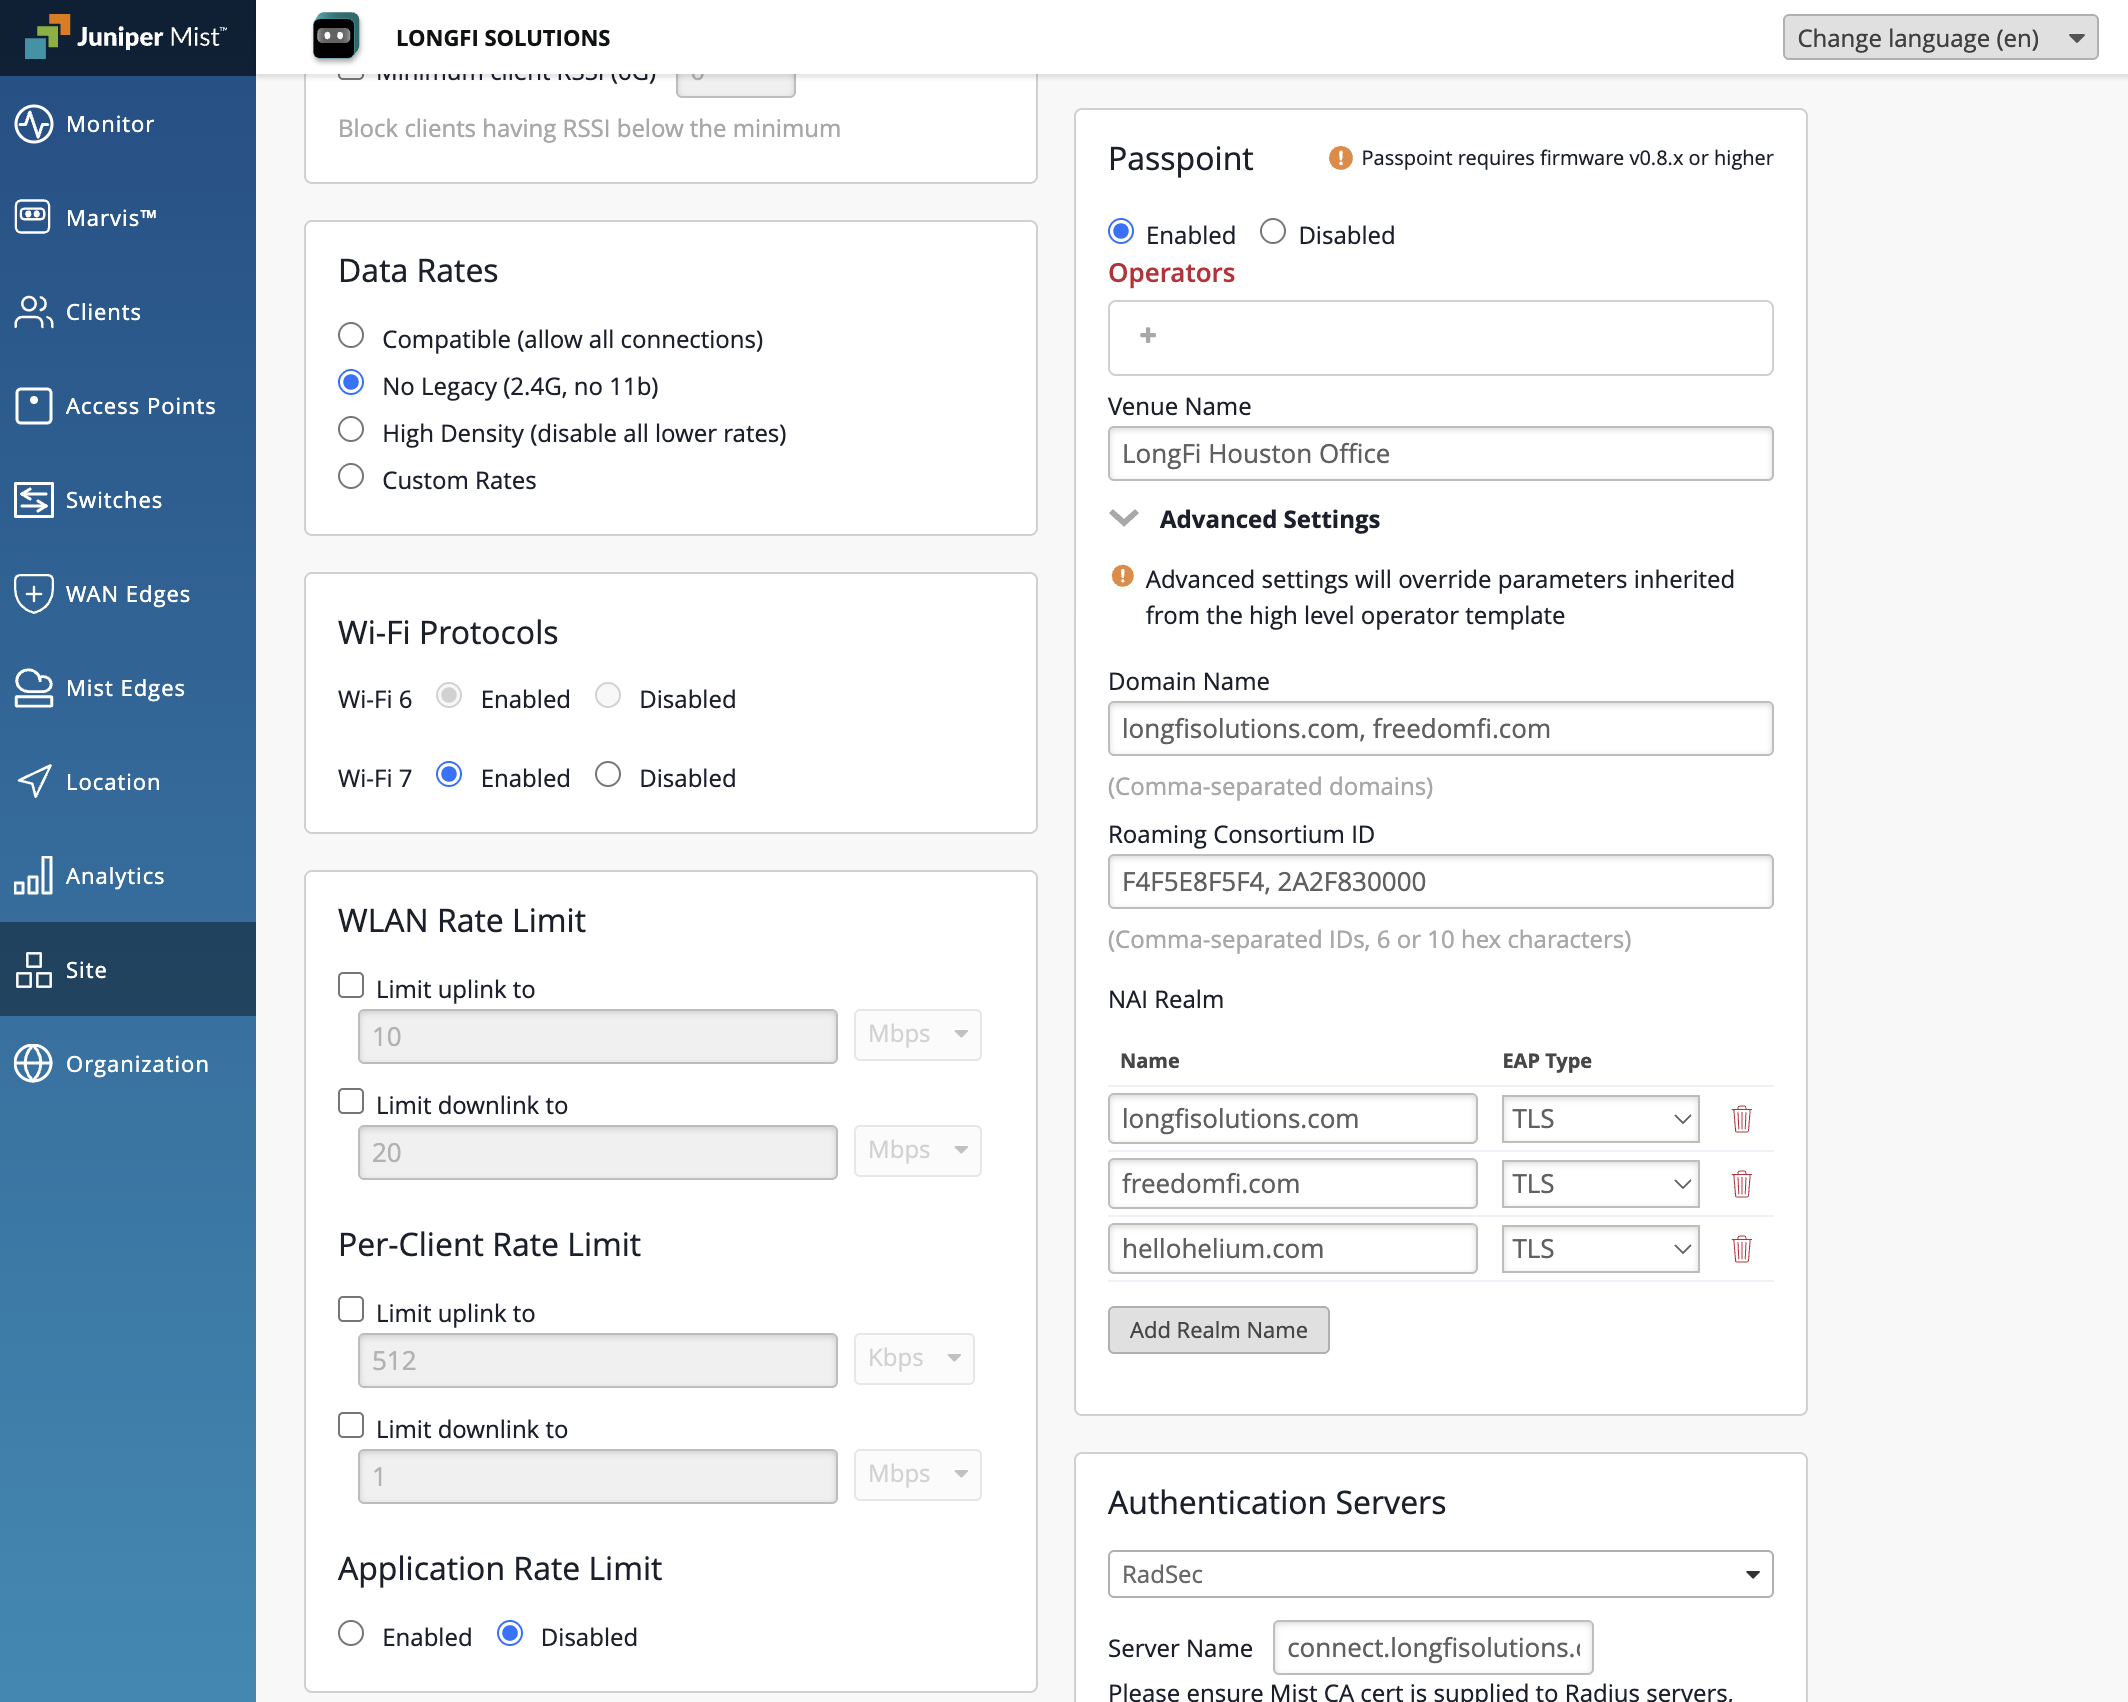
- Scroll down to Passpoint and click Enabled
- Under Operators, select the operators that have been approved for activation at your site. Please reference your onboarding and activation emails. Operators may be activated only at approved sites.
- You must select a single Operator to save the SSID. For now select Google
- Under Venue Name enter an appropriate venue name (ie. LongFi Houston Office)
- Click on the arrow ⌄ button to expand the Passpoint Advanced Settings
- Under Domain Name enter the following domains separated by a comma and a space:
- longfisolutions.com, freedomfi.com
- Under Roaming Consortium ID enter the following RCOI numbers separated by a comma and a space:
- F4F5E8F5F4, 2A2F830000
- Under NAI Realm enter the following realms, all with the EAP Type set to TLS:
- longfisolutions.com
- freedomfi.com
- hellohelium.com
Configure RADIUS for the Passpoint Wi-Fi SSID
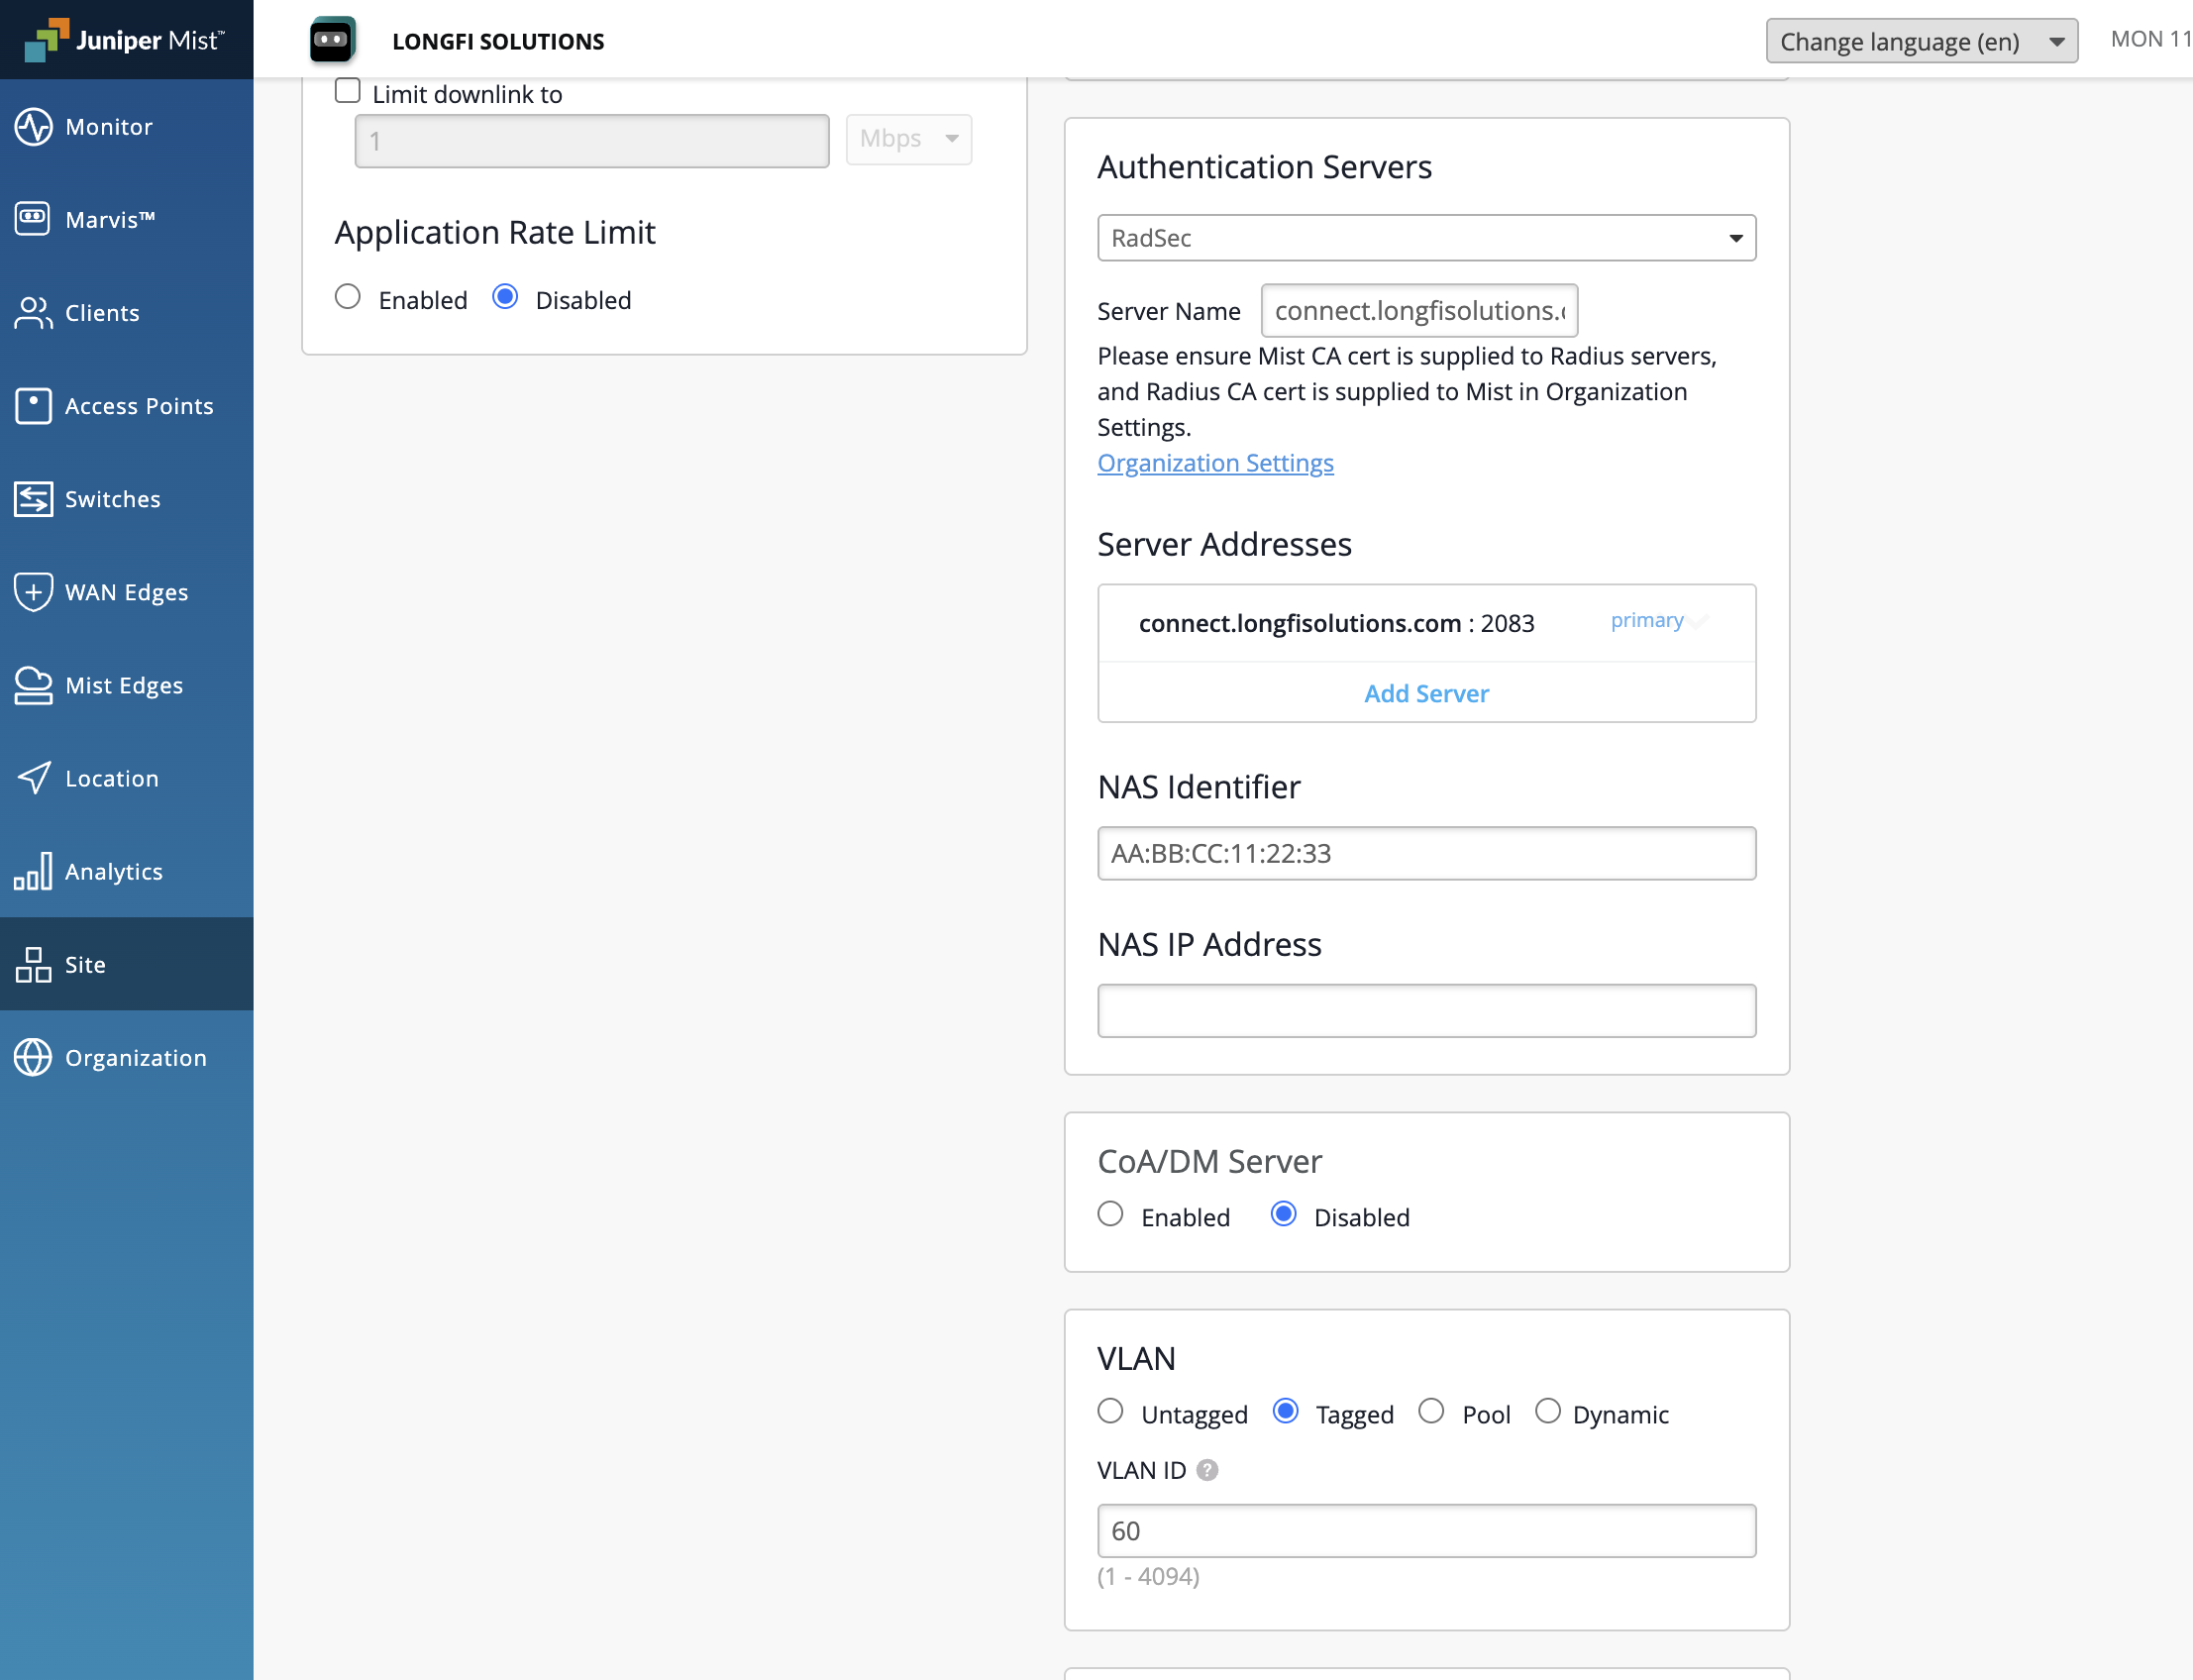
- Staying in the new WLAN window, scroll down to Authentication Servers
- From the drop down menu change RADIUS to RadSec
- In the Server Name field enter connect.longfisolutions.com
- Under Server Addresses click Add Server
- In the New Server window, under Hostname enter connect.longfisolutions.com
- Set the Port to 2083
- Under NAS Identifier copy and paste the NAS ID used to register and activate your site (this is normally a MAC address)
- Click the checkmark to save
- Scroll down to the VLAN settings and select Tagged
- Enter the VLAN ID you are using for your Passpoint Wi-Fi VLAN (or Pool or Dynamic if you have that requirement)
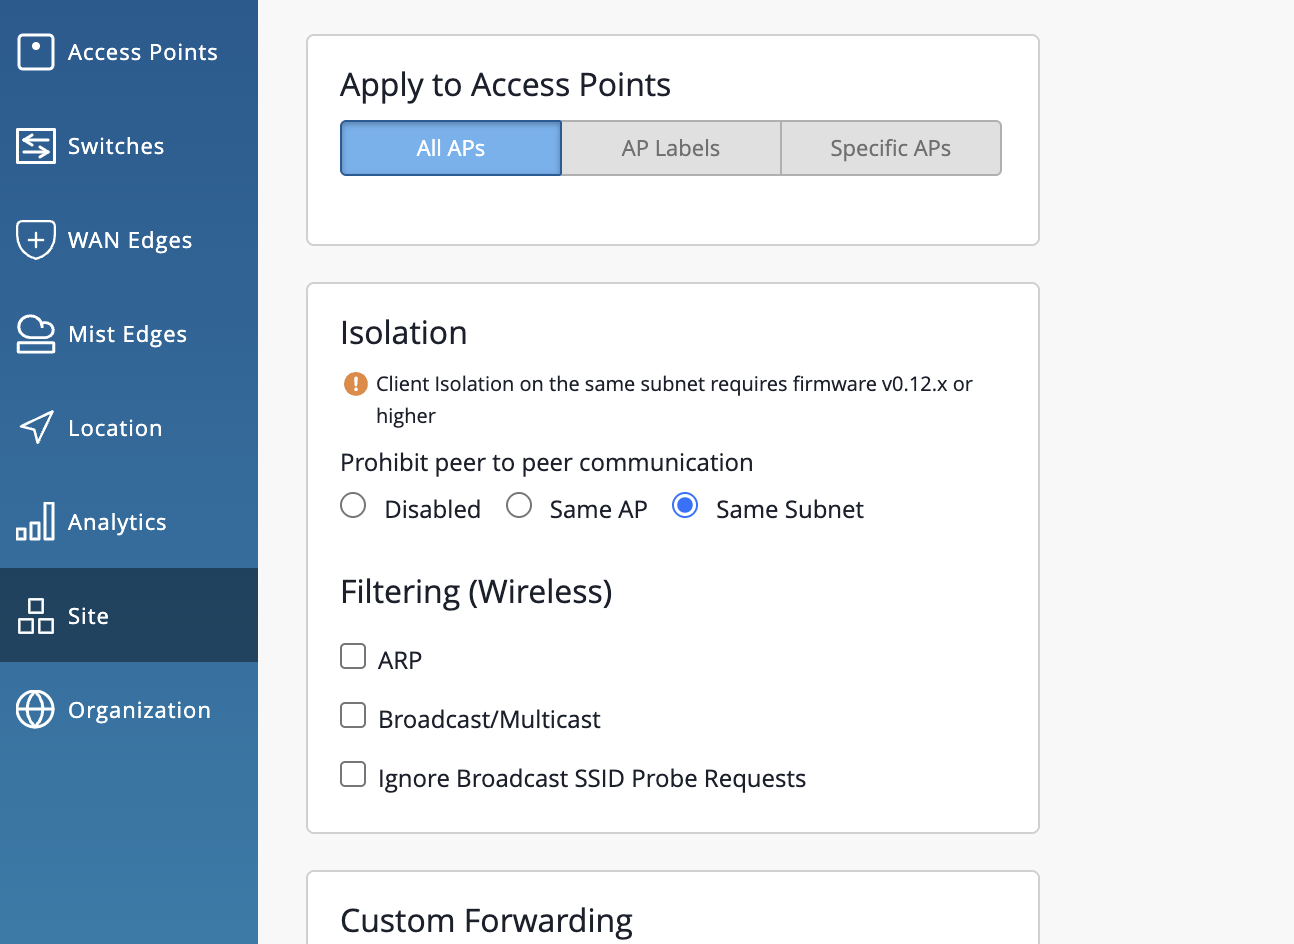
- Scroll down to Isolation and select Same Subnet
- Scroll back to the top of the new WLAN windows and click Create to create the new LongFi Passpoint WLAN
Other Recommended Settings
- For general Wi-Fi configuration and optimization best-practices, please review our Best Practices guide. Some of these settings will be unique to your individual network requirements.
- For now we recommend disabling 2.4 GHz in the new WLAN settings
- We also recommend enabling Isolation in the new WLAN settings
- In the Isolation window set Prohibit peer to peer communication to Same Subnet
- Make sure that the new LongFi Passpoint WLAN is applied to your site and APs.
- You may now test Passpoint Wi-Fi and Carrier Offload
- If Passpoint Clients can connect, you can verify connectivity, DHCP, DNS, and 802.1X Identity under the Clients > Wi-Fi Clients section in Mist
Congratulations! You have successfully configured LongFi Connect Passpoint for Carrier Offload in HPE Juniper Mist.